By God’s Country Development – Grand Junction & Fruita, CO
Building a new home or an ADU can feel overwhelming if you’ve never been through the process before. At God’s Country Development, we believe the best way to build trust is by being clear and transparent about how we work. That’s why we’ve built a process that takes you from the very first step—laying the slab—all the way to the final walkthrough and punch list with confidence.
Here’s what you can expect when you build with us.
1. Pre-Construction Planning
Before we pour a single yard of concrete, our team works with you to:
-
Review plans and specifications
-
Confirm your selections and specifications (finishes, fixtures, and upgrades)
-
Submit for permits and city approvals (Grand Junction, Fruita, or Mesa County)
-
Coordinate site prep and utility locates. Full Pre-construction packet, subcontractor submittals, scope of work, and permit packets.
This stage eliminates surprises and ensures that we’re all aligned on budget, schedule, and scope. This also allows us to efficiently execute the project.
2. Foundation – Slab on Grade or Crawlspace
Most of our builds are on a slab foundation—the most efficient and cost-effective option for Western Colorado. Here’s how it works:
-
Excavate and prepare the pad with compacted gravel in 6” lifts
-
Install footings, reinforcement steel (Generally #5 rebar)
-
Place and finish concrete slab per engineered specs
-
Allow curing time before framing begins
Note: Some projects may use a stem wall or crawlspace if the site or design requires it.
3. Framing & Exterior Shell
Once the slab is set, the project really takes shape:
-
Framing walls, floors, and roof system
-
Installing windows and exterior doors
-
Roofing and exterior wrap to get the home “dried in”
-
Optional stucco, siding, or exterior finish per owner selections
This is the stage where the house starts to look like a home from the outside.
4. Mechanical, Electrical, and Plumbing (MEP)
Before drywall goes up, our licensed MEP subcontractors install:
-
Plumbing rough-ins for kitchens, baths, and laundry
-
Electrical wiring, breaker panel, and outlets
-
HVAC system including ductwork and ventilation
-
City and county inspections to ensure code compliance, including frame inspection.
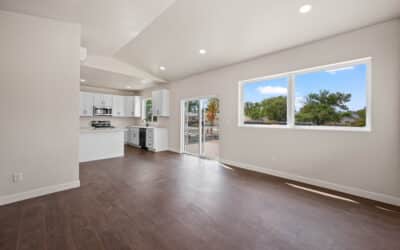
5. Insulation, Drywall & Interior Finishes
With the MEP systems approved, we move into interior finish work:
-
Insulate walls and ceilings
-
Hang, tape, and texture drywall
-
Interior paint and trim
-
Flooring, cabinets, countertops, and fixtures installed
-
Appliance setup and final mechanical connections
6. Final Punch List & Walkthrough
The last stage is where we fine-tune every detail:
-
Conduct a walkthrough with the owner
-
Create a punch list of any touch-ups or final adjustments
-
Complete all warranty items prior to closeout
-
Deliver a warranty & service commitment so you have peace of mind long after move-in
Why Clients Choose God’s Country Development
-
Investor-friendly builds – Our ADUs and custom homes are designed to cash flow immediately and appraise higher than their cost.
-
Transparency – Clear scopes, contracts, and allowances eliminate guesswork.
-
Local expertise – We know how to navigate Grand Junction and Fruita’s permitting, zoning, and site challenges.
-
Timeless design – Our homes balance modern amenities with country durability, built to last.
Ready to Build?
Whether you’re planning a custom home, an addition, or an ADU, our process is designed to make it smooth, profitable, and stress-free. From slab to walkthrough, you’ll know exactly what to expect at every stage.
👉 Contact God’s Country Development today at godscountrydev.com to schedule a free consultation.